Mails have become essential in our daily lives. According to entrepreneur.com, “About 250 billion emails are sent daily, as per an Email Marketing Report”. They have existed for a long time and with several clients available, creating a Professional Email is more important than ever.
One can keep records, apply for jobs, send campaigns and even communicate through the mail. So, one must adhere to a good email format and follow appropriate email etiquette.
Here is a 7-step guide for creating professional emails and how to communicate through them.
Step 1: Use a Professional Email Address
The first step in creating a professional email is selecting an appropriate email address. Ideally, it should include your first name, last name, or a combination of both. Avoid using nicknames, slang, or overly complex combinations.
Here are some key considerations when selecting a professional email address:
- Use Your Name: This makes it easy for recipients to identify you and adds a personal touch to your communication.
- Avoid Nicknames or Abbreviations: It’s best to stick to your full name or a recognizable variation of it. Using nicknames or abbreviations could be confusing or unprofessional.
- Consider Including Your Profession or Industry: If your name is common and the exact combination is already taken, you can consider adding your profession or industry to your email address.
- Choose a Reputable Email Service Provider: It’s important to use a reliable email service provider, as these platforms offer advanced features, robust security measures, and a professional interface.
Examples of professional email addresses are – john.smith@example.com, j.smith@example.com, john.smith.marketing@example.com, and j.smith.engineer@example.com.
Step 2: Add a Subject Line with CC, BCC recipients
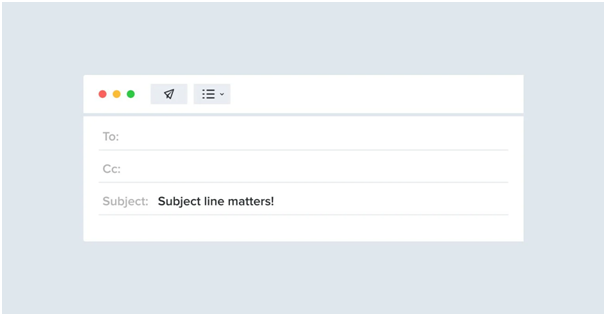
An email subject line is what a recipient notices about an email message. Write a catchy title and don’t leave it blank because such emails are less likely to be opened.
Here are a few things to consider about adding subject lines in professional emails.
- For sending emails to a person, type the name of the recipient and for bulk emails, add them as CC and BCC recipients.
- Refrain from subject lines with “Hello” or “Please read” unless the person is well known.
Examples of proper email subject lines:
“Application resume for John Smith”
“Feedback on draft report needed by Monday”
“Question about apartment listing – 123 Maple Street”
“Intimation of inability to work on 12th March 2022”
Step 3: Address the recipient with a formal Greeting
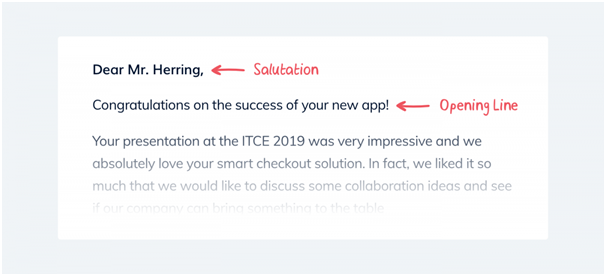
A good email courtesy is to greet the recipient as “Dear Mr. Smith” or “To Ms. Amrita” instead of the typical “Hello” or “Hi”.
Naming the recipient initiates the action and engages the reader to reply. Adding their salutation and designation is always encouraged.
Often, a First Name is fine but in formal settings, address the recipient with their Full Name. This helps to avoid common pronunciation and spelling errors.
Adding prefixes like “Ms.” or “Mr.” is acceptable. One can also mention the Title and Last Name as appropriate.
If you don’t know the recipient, refer to them as “To the Head of Marketing Department” or “To Head of Business Affairs”.
Step 4: Email Context and Email Sign-Off
Email Context
The Email Body Context explains the actual purpose of an email and provides any necessary information for the readers.
Best practices to follow when composing the email context:
- Add paragraphs and break sentences into bullet points for ease of understanding for readers.
- Avoid exaggeration and maintain consistency in the language used. Clearly state your intent through the message.
- Provide a call-to-action that the recipient can perform after reading the message.
- Avoid sounding stiff and vague. Use professionalism to capture the attention of the readers.
- Be as concise as possible to avoid spelling and grammatical errors. Check your text on websites like grammarly.com to be sure.
Email Sign-Off
A Sign-Off is the concluding line before a message ends. Including a “Thank you” note and a call to Action like “Wishing to hear from you soon” or “Please contact me in case of any queries” is better than appearing rude and abrupt.
So, adding titles under fillers like “Regards” and “Thanking you.” is good email etiquette but one can change it up based on preferences.
Step 5: Use a professional Email Signature
What is an Email Signature and why is it used?
An email signature is an incredibly effective branding tool and according to a report, “82% of marketers use them to increase brand awareness and reputation”.
What constitutes a good Email Signature?
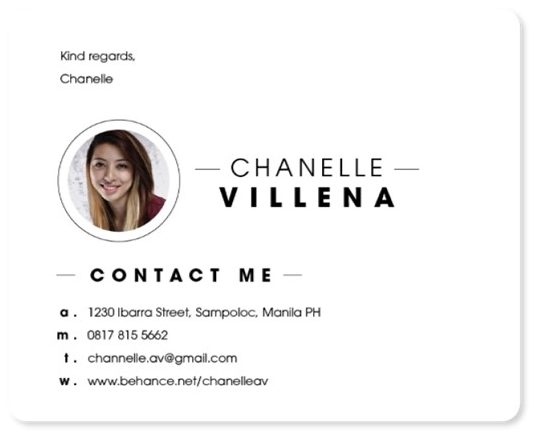
Good Email Signatures contain links, brand logos and information like contact details, address or summary. It is useful for generating conversions and leads.
Where can Email Signatures be created?
Utilities like Hubspot Email Signature tool, Canva Email Signature Maker, MySignature.io and Wise Stamp Email Signature Generator help you create email signatures.
Step 6: Proofread your Email Composition
Proofreading emails is important before sending them. One must check the accuracy of the content created and avoid spelling errors at any cost.
For the best approach, it is recommended to save an email draft and revise it later with fresh eyes.
For attachments, one must follow guidelines for correct file format and size optimizations. Preferably, 25 MB is the file size beyond which most email clients place restrictions.
Step 7: Configure Email Client Advanced Settings
Check Advanced Settings for your respective email client and set safeguards like time limit extensions for unsending emails. Avoid embarrassments by optimizing them for maximum efficiency.
Other Professional Email practices one can follow:
- Organize the Email Inbox, and reduce spam and clutter for maximum productivity.
- Use email templates for professional email compositions.
- Plan email compositions and follow required email etiquettes for the best experience.




0 Comments